Adobe After Effects For Beginners
Adobe After Effects For Beginners
Digital Marketing, technology & business insights, how to’s and explainer videos, released on a Wednesday. Make sure to subscribe to be notified and sign up to our mailing list! 🎥
See below, the transcript from this episode of Giant Wednesday if videos aren’t your preferred method to consume digital skills. See also the Giant Cheat Sheet from this episode.
If you want to know more, get in touch today 😎
Have you ever opened After Effects, and (after waiting several months for it to load) quit out straight away because of how scary it looks?
Even if you’re a Premiere Pro whiz, don’t fool yourself into thinking the animation software is going to be a total breeze.
But worry not, we’re here to go through 5 tips that will help you tackle this beast, even if you’re a complete beginner.
Opening After Effects
So the first crucial step is opening After Effects. Once opened, you’ll need to create a new composition by clicking on the big button in the middle of the screen. Set all the dimensions for the video you want (we suggest 1080 x 1920), as well as the duration for your video.
Once you hit okay, you’ll be presented with this screen here.
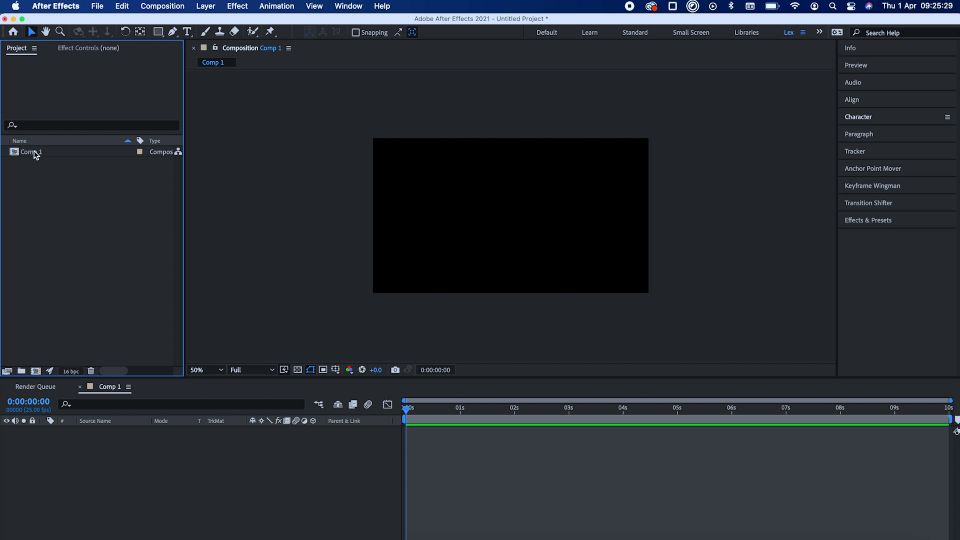
Let’s break down what you’re looking at exactly.
Tip 1 – The Layout
On the left side of the screen, you’ll see your project window. You can begin your project by double-clicking in this window to find video and image files to add to your project.
Along the bottom of the screen, you’ll see your timeline. Any video, audio or image files currently in your timeline will show on the left, with the bars on the timeline representing how long they are on screen for. The layer that is on the top layer is the most visible, so bear this in mind if you can’t see something you’ve added to your timeline.
Along the right side, you’ll see a series of options, the only one we’ll cover for today is ‘Preview’ which is where you’ll find your timeline controls such as frame forward/backwards and play/pause. You can play your timeline by simply hitting space – but you can change this key in the preview window to something you may prefer.
Should you wish to change your composition settings at any point, such as dimensions, or length – go to Composition at the top, followed by composition settings, which will allow you to edit as you see fit.
Tip 2 – Controls and shortcuts in After Effects
To make your Adobe After Effects journey easier, it’s crucial that you learn some key shortcuts.
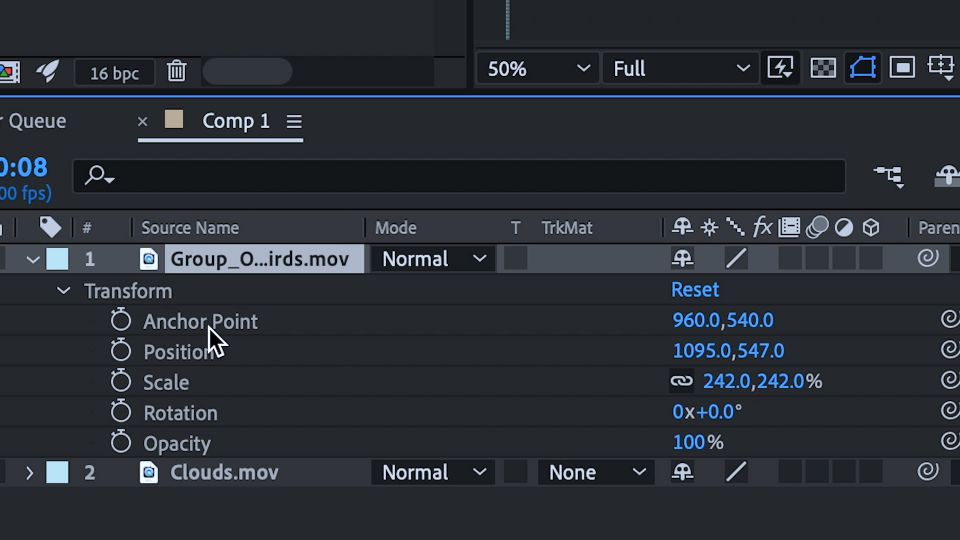
With a file in your timeline selected, hit S to adjust the scale of your item, you can then change the numbers to the right of your file name to adjust the size.
Similarly, use the shortcut P to adjust the position, R to adjust the rotation and T to adjust the opacity (yeah, that one doesn’t quite fit the pattern).
Alternatively, you can see all of these commands at once by clicking the drop-down arrow to the left of your file name which will give you all the properties for that one layer.
Tip 3 – The basics of animation in After Effects
So now you’re a master of adjusting the position and scale of your elements, let’s learn how to animate these from one video frame to another.
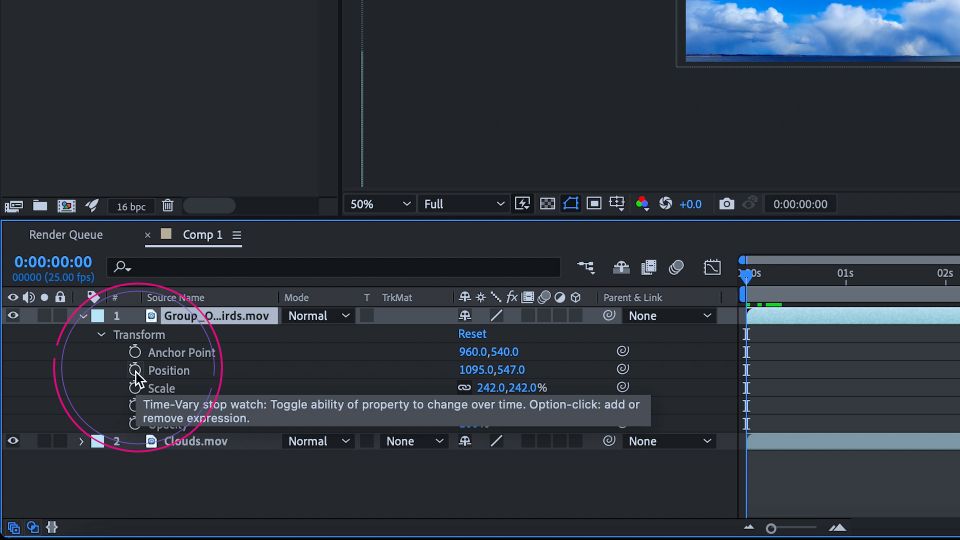
If you wanted one element to move from one side of your screen to the other, scroll to the beginning, and to the left of the ‘Position’ marker (remember, press P if it isn’t visible), click on the stopwatch.
That stopwatch will give you a keyframe for that position marker. Now if you move to another position in the timeline and change your position variable, After Effects will automatically create an animation between those two keyframes.
It’s the same principle for scale, rotation, anything! Try animating the rotation, scale and position of something at the same time – get creative!
Tip 4 – Understanding layers and the timeline in After Effects
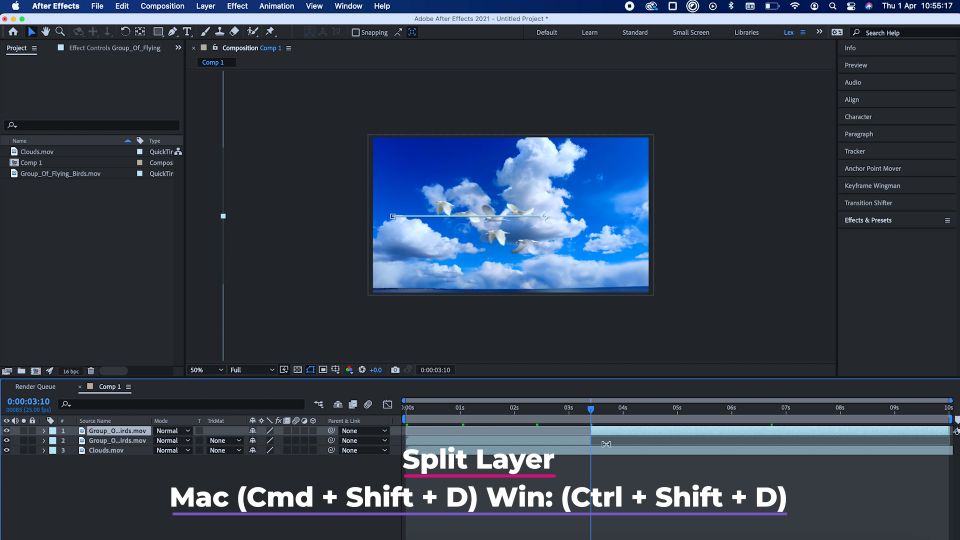
Unlike Premiere where multiple video/audio files can sit on one channel After Effects requires you to have a separate layer for every single different file, even the same file cut in half!
Because of this, we’d remind you that After Effects isn’t cut out as a video editor. If you’re chopping the umms and ahhs out of a reel of footage, you’re going to end up with a million layers if you use After Effects to do this. Our recommendation? Edit your video in Premiere Pro, and then export it to After Effects to add all the glitter.
If you did want to split a layer on your timeline, simply scroll to the point that you want it to be, and then hold ‘command/ctrl + shift + D’ that will split your layer into two.
You can then either delete that or move it up or down your timeline.
Tip 5 – Exporting in After Effects
So now your masterpiece is finished, you’ll obviously want to know how to export it so you can show the world.
The blue bar that sits on top of your timeline represents everything that’s going to export from our timeline. You can adjust it manually, or you can scroll to the point where you want your video to begin and press B, and then set the endpoint by pressing N.
Once this is adjusted, head on over to file > export and add to render queue.
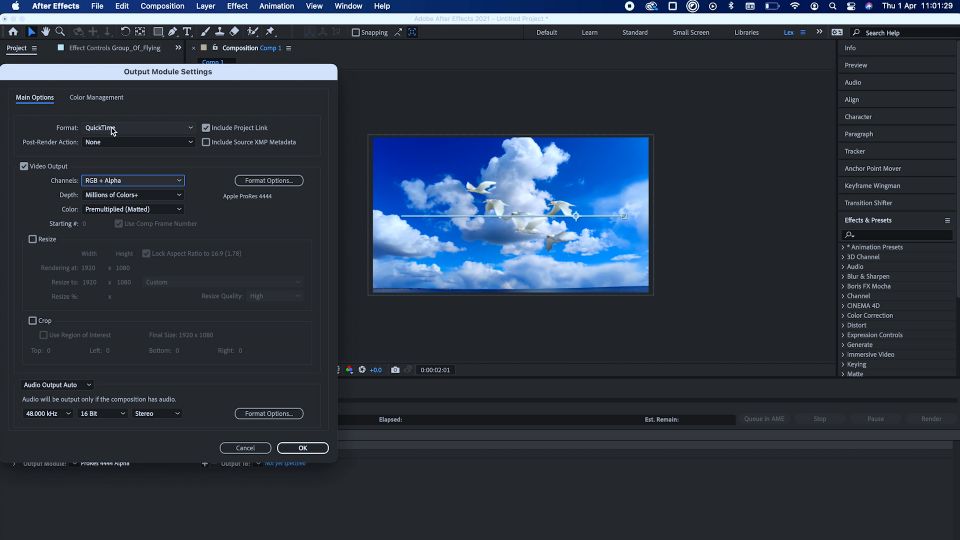
It’s worth mentioning that After Effects cannot render into H264 or MP4 files, it can only export into things like .MOV files which tend to be quite large, though there are still multiple benefits of having them, such as the option to have transparency in your video.
If you want to export as a .MOV file, make sure your video format is QuickTime, and your channels are set to RGB + Alpha.
Finally hit render which will begin the rendering process.
If you do want to render straight into H264 or MP4, go File > Export and then ‘add to Adobe Media encoder queue’ which will open Adobe Media Encoder.
From here, you can set the location it will output to, adjust your video settings and change your video codec to H264.
Finally, hit OK and then press play at the top to begin the render.
Full disclosure, this may take a while – put the kettle on?
That was the basics from us about Adobe Premiere Pro – was there anything we didn’t cover that you were hoping we would? Just let us know and we’ll get back to you!
After Effects is an incredible, versatile program that is well worth the time and patience it takes to learn it. Doing so will add a wealth of different things to your content that will no doubt take it to the next level.
For more tips on how you can increase your digital marketing and content game, why not check out our other Giant Wednesdays?
Sign Up For Giant Wednesday In Your Inbox
Use the form below to sign up and we'll send you fortnightly update emails when a new episode of Giant Wednesday is launched.
Want results like these?
So, you’ve seen how we do it — and you know what we’re capable of. If your brand or business could benefit from results like these, get in touch with us today to unleash your potential.


Follow Us
Sign Up For More
Stay up to date with the latest happenings, learnings, events & more with our GIANT Newsletters.
Contact Us
Top Floor, The Civic Centre, Castle Hill Avenue, Folkestone CT20 2QY.
Copyright © 2022 Sleeping Giant Media. All Rights Reserved.