How To Cut Out A Person Or Object In Photoshop
How To Cut Out A Person Or Object In Photoshop
Digital Marketing, technology & business insights, how to’s and explainer videos, released on a Wednesday. Make sure to subscribe to be notified and sign up to our mailing list! 🎥
See below, the transcript from this episode of Giant Wednesday if videos aren’t your preferred method to consume digital skills. See also the Giant Cheat Sheet from this episode.
If you want to know more, get in touch today 😎
I know why you’re here, you want to learn how to cut people out of your life.
No, wait, sorry – how to cut people out on Photoshop.
There are loads of reasons you may want to cut someone out of an image – maybe you want to put a cutout on your website, maybe you want to use them on display ads. Maybe you have other nefarious purposes, who knows?
So I’m using Adobe Photoshop 2021 on an Apple MacBook Pro. Some of these features were added quite recently, but if you’re using a slightly older version of Photoshop, there will still be some principles you can use – and certainly, if you’re using a Windows computer, it shouldn’t be a problem for you.
So let’s get straight on with it, shall we? So, one of my favourite things to do is look at hilarious stock-photo images. For example, here’s a woman playing VR with a PlayStation 2 controller, and a VR thing that holds a phone. There are just so many things wrong with it. But, for the purposes of this tutorial let’s try and cut her out.
Now you can use the quick selection tool, maybe you’re familiar with that. And that allows you to sort of paint a selection onto the person, but you’ll find that when you cut them out it normally has quite a choppy edge. So what you want to do is, with this quick selection tool selected, or any of these selection tools, you want to go to ‘Select Subject’.
That’s going to automatically create a selection from the most prominent object in the image. When you do this, you’ll see that it instantly creates a cutout of her. You’ll see it even manages to grab some of the finer details like the hair, but you may find that it takes some parts out of the image that you wanted to stay in.
If that happens, don’t worry – simply hold Shift and you can paint that part of the selection back on. Alternatively, if it has selected something that you don’t want in your image, you can hold Alt/Option and paint the area you wish to remove from the selection.
So that’s a really quick way of doing it. You can cut them with Command+X and then paste them on a newly created layer with Command+Shift+V. You can now replace the background with a colour or anything you like, really!
But what happens if you have someone that’s on a busier background? It’s not often that you get a photo of someone against a plain or a single-colour background. Well, let’s go ahead and follow the same steps that we did before. We’ll click Select Subject, and as we saw before Photoshop has still done a pretty good job of getting that cutout, despite the busy background.
To refine our selection even further, let’s click on Select and Mask, next to Select Subject. That’s going to put you in a new window.
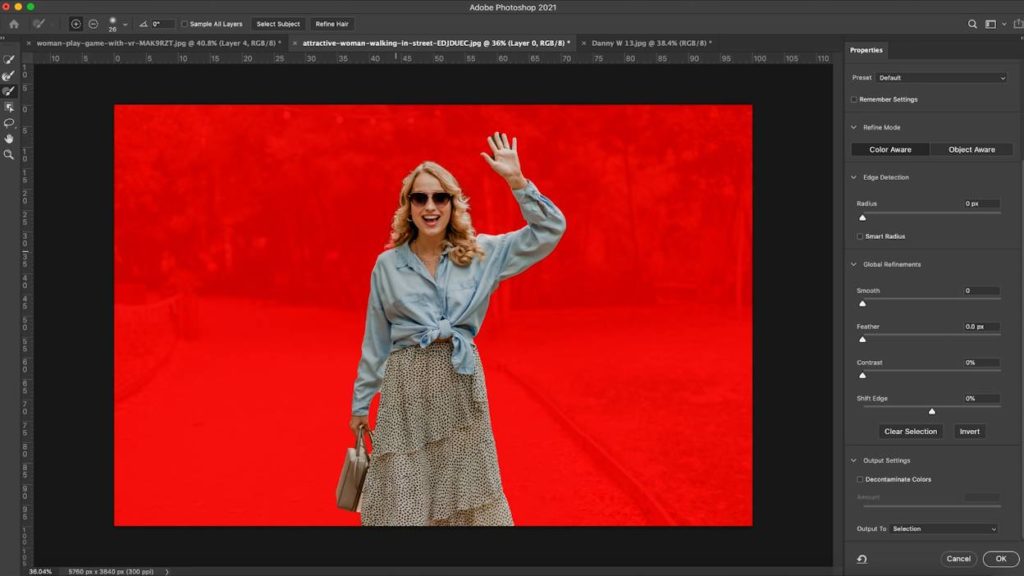
You can select a host of different view settings with a drop-down box, but don’t worry – this isn’t actually going to change your background colour. It’s just an easier way of seeing what you have selected. Personally, I go with ‘On Black’ or ‘Overlay’, but play around with it and see whatever you prefer. Of course, you can change them as you go.
The first thing you want to do with this is you want to scroll down to ‘Decontaminate Colours’. What that will do is take away any bleeding colour or white from around their edge. After selecting that, scroll up and increase your edge detection radius to automatically detect the edges.
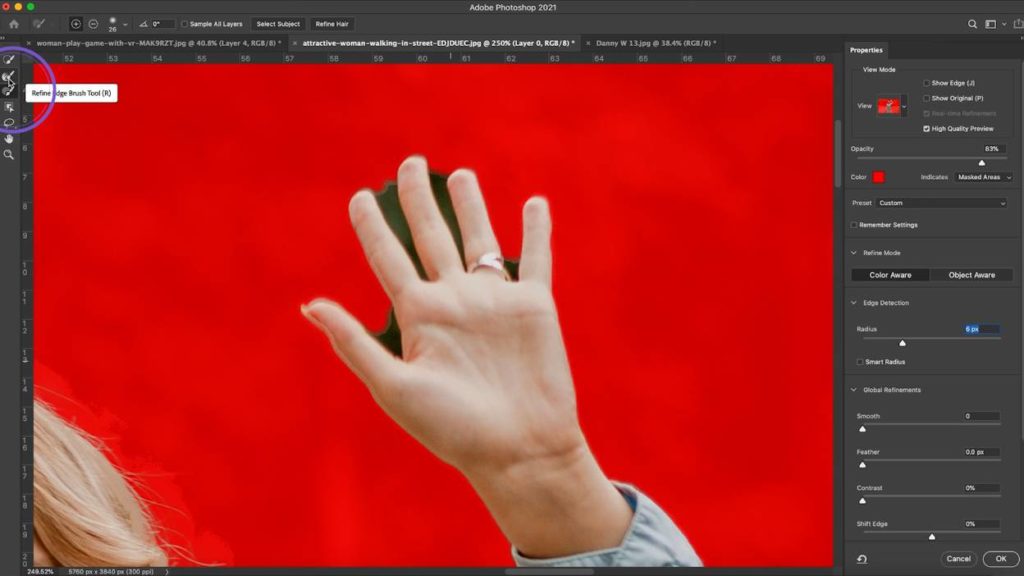
So what if there are still details that have been missed, like the hand up here? Don’t worry! We’ve got two tools here, the ‘Refine Edge Brush’ tool and the ‘Brush’ tool. The Refine Edge Brush allows us to paint onto the unwanted part or colour on the image and tell Photoshop, “We don’t want this part.” Let’s go ahead and hit ‘Okay’ on that, and as you can see, that gives us a pretty good cutout.
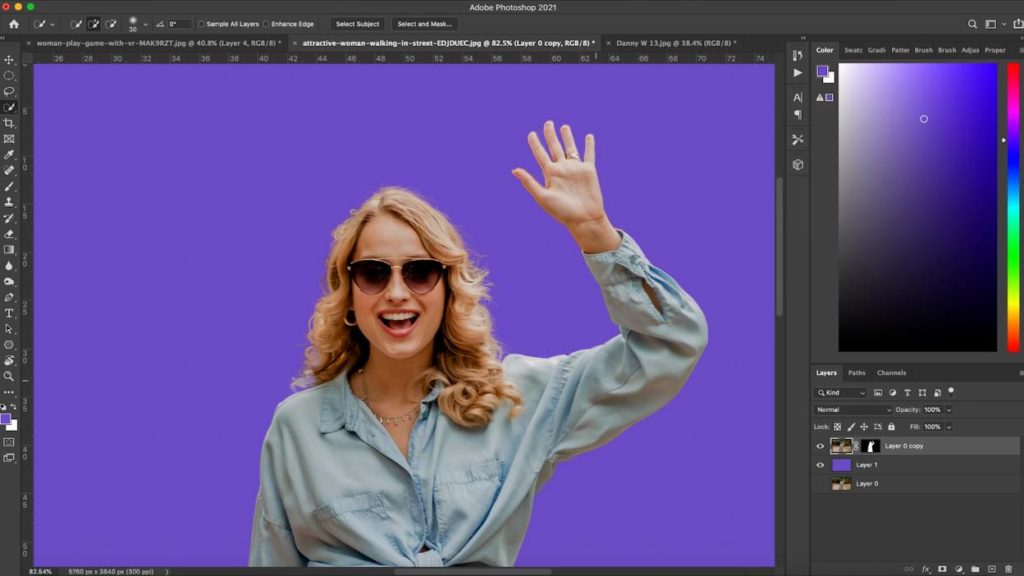
Now, this creates a mask on your original layer, so you can transform it and move it around. Alternatively, you can right-click and convert your layer to a smart object. This means if you scale or move your image around, you’re not going to lose any resolution.
If for some reason you want to edit your cutout even finer, you can right-click again, and Rasterize the layer. Once this is done, you can use tools like the Eraser tool to remove parts of your image.
Okay, so what if you want video thumbnails like the big YouTube stars and have your cut out images with a white stroke around them? Don’t try and do that to the selections we’ve created using the first two methods as the end result will be very messy. Instead – let’s use the Pen tool.
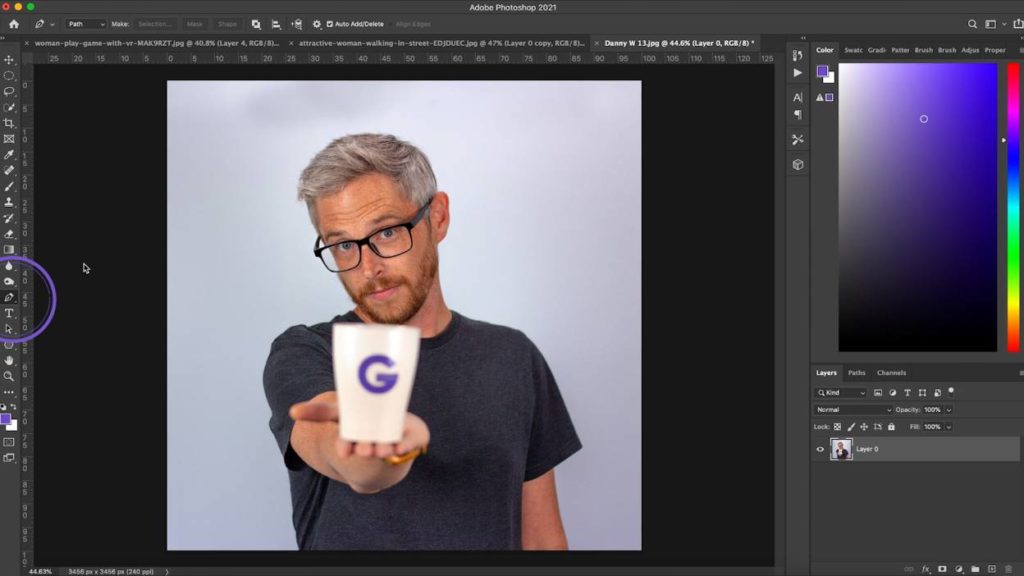
The Pen tool can be a bit fiddly, but here are a few quick tips to help you on your way to Pen mastery.
Create a new point – Left click
Create a curve – Left Click, hold and drag
Make next point a right angle from the previous point – Hold Alt/Option and click on the centre of the point
Adjust existing curve – Hold Command, click on the end of the line sticking out from your curved point, and drag it to adjust as needed.
With this knowledge at your disposal, go around your image and manually create a selection of your subject. Anytime you get to hair, don’t try and cut around individual hairs, just stick to the main shape.
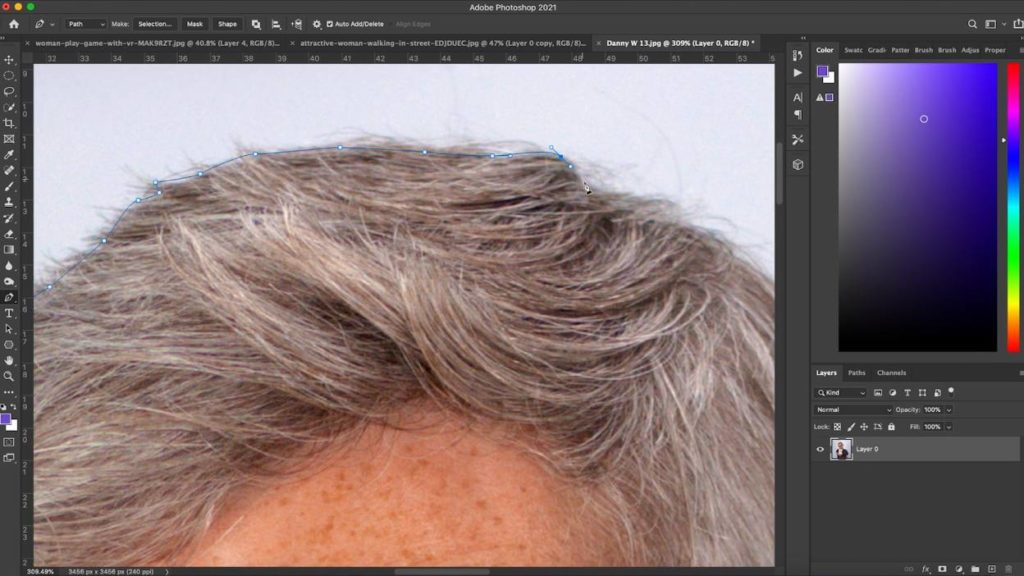
After that’s been done, close the path by clicking on your first point to connect it up, then right-click and make a selection. Make sure that the Feather Radius is set to zero, and then we have our selection!
Now we can cut and paste this selection to a new layer, and by double-clicking on your layer in the layers panel, you can apply a stroke over the top. Give it a nice, clean-cut, white stroke around the outside. Look at that – we’re ready to put that on a thumbnail!
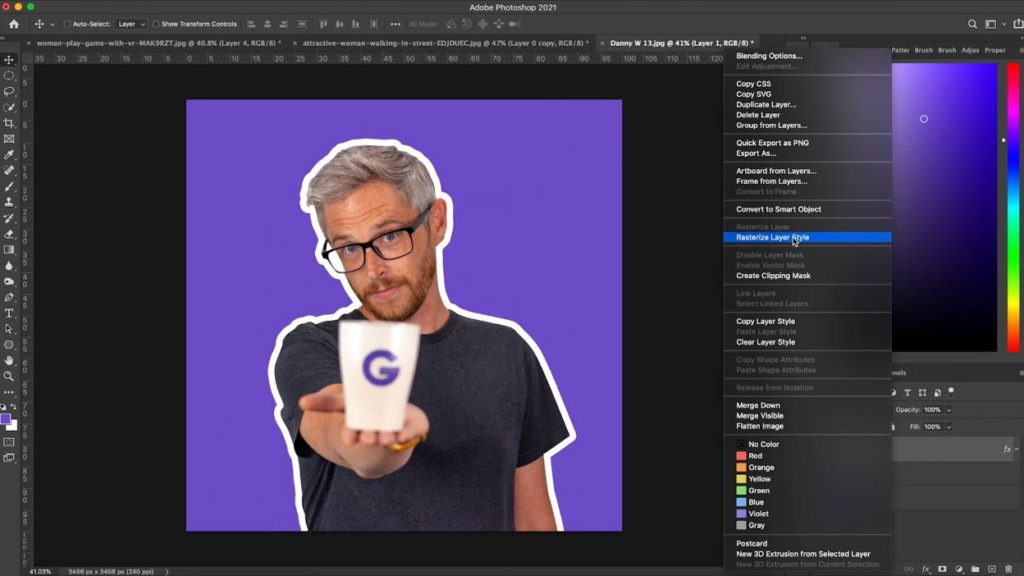
Now bear in mind the stroke amount will stay the same regardless of the size. If you don’t want that to be the case, you can right-click on the layer, and you can Rasterize the layer style. This will keep the stroke the same thickness as you scale your image and move it around.
One final alternative is using the site Remove.bg. There’s been a lot of LinkedIn posts recently highlighting Remove.bg and the fact that you can just upload an image, and it will automatically remove the background for you. It’s a very clever bit of software, but personally, I don’t use it. For me, I feel like it’s actually quicker for me to do it in Photoshop using the three methods we’ve already covered.
Remove.bg does cost money as well for a high-resolution image. If you are cutting people out a lot, this service may be worth it for you. Give it a try, and see what option works best for you, ultimately.
Okay, so that was a quick rundown on how to cut people out on Photoshop! I hope you learnt something you can now use on your path to Photoshop Mastery!
Join us next time where I will teach you how to cut people out of your life! Only kidding…
Sign Up For Giant Wednesday In Your Inbox
Use the form below to sign up and we'll send you fortnightly update emails when a new episode of Giant Wednesday is launched.
Want results like these?
So, you’ve seen how we do it — and you know what we’re capable of. If your brand or business could benefit from results like these, get in touch with us today to unleash your potential.


Follow Us
Sign Up For More
Stay up to date with the latest happenings, learnings, events & more with our GIANT Newsletters.
Contact Us
Top Floor, The Civic Centre, Castle Hill Avenue, Folkestone CT20 2QY.
Copyright © 2022 Sleeping Giant Media. All Rights Reserved.